Part 2: Adding Content to an ARK Section or Topic
This document is the second part of a guide to Signalling with Text and Media Areas. Part 1 introduced Signalling Principle.
Related documentation is available for:
In this part of our series on applying Signalling Principle in ARK, we’re going to use Text and Media Areas and Activity Descriptions to Signal to students how to engage with learning materials.
ARK skills you will learn in this section include:
- working in editing mode in ARK,
- rearranging activities,
- adding activities and resources,
- using Text and Media Areas,
- using Descriptions
Introduction to the material being used
In late 2022, the IT Team began a process of reviewing and refreshing training and documentation on the platforms used by academics new to the University. In 2023, Uniting College for Leadership and Theology offered to allocate some staff time to assist us with bringing an academic’s perspective to this work, so Dr Toar Hutagalung has been assisting us in this project.

In this article, we’re going to use a week from one of Toar’s units. Toar describes the unit as follows:
This class is designed for a blended format, which means not only I am anticipating students to come in person, but students can also join online synchronously, like through zoom, and asynchronously, according to their own pace for that week, and the asynchronous students can see the recordings of the lecture. There are both level 2 and level 9 students looking at Christian histories, starting around the year of 1500 to now.
For this demonstration, Toar has given us the following:
- a description and learning objectives for the week,
- some readings and resources,
- a PowerPoint from the lecture and recording of the lecture,
- discussion questions, and
- a textbook chapter the students need to read.
Step One: Uploading Files and Adding Resources
- We’ll begin by enabling editing mode. We can do this by using the toggle in the top right corner:

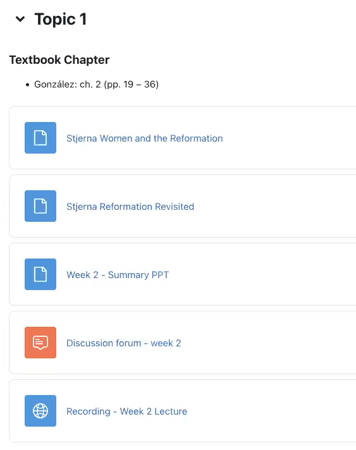
- With edit mode on, drag and drop the files from our computer into the section.
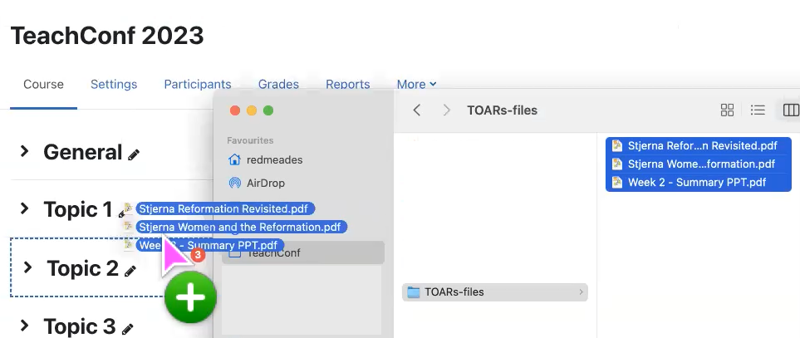
You could also click to Add an activity or resource, and select a File Resource to do this one by one. However, drag and drop is a bit quicker.
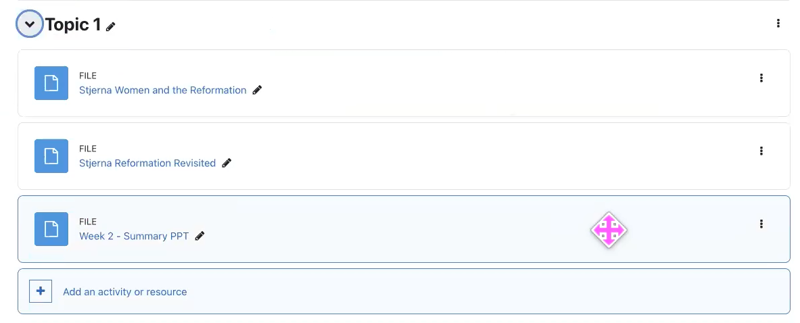
- In edit mode, we can easily reorder the content, so lets place them in the order we need them. You can do this by clicking and dragging an activity or resource to the place you need it.
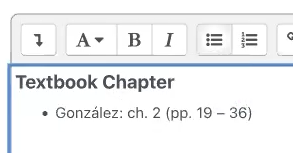
- In our example, the students read multiple chapters from the textbook so they have purchased a copy. Since we’re not uploading or linking to that reading, we want to tell the students what to read somehow. To do this, we’re going to click Add an activity or resource and click Text and Media Area. (See Activity Chooser to learn more about adding Activities or Resources.)

Note
Text and Media Area was called Label on older versions of ARK but the name has been changed. However, the functionality has not changed at all.- In the Text Editor, we’re going to paste the chapter.
We’ll make this easier to read by making the top line a small heading and adding a bulleted list to visually signal this is an action item.
See also
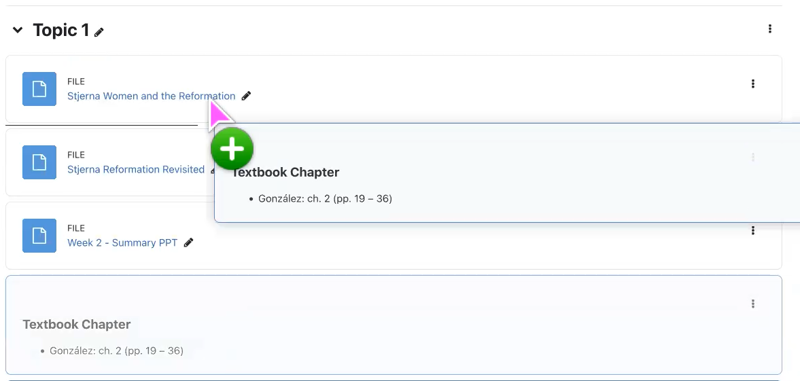
See the Text Editor documentation for more guidance about formatting text on ARK.- Click Save. And place it in the right spot by dragging it to the location.
- Now, we’ll add a Forum to allow the students to answer the discussion questions. We’ll leave the forum settings as they are but add the questions to the description. We’ll present these questions as an ordered list.

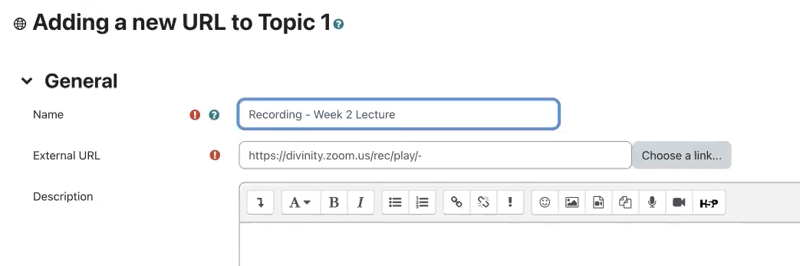
- And we’ll add a URL Resource and link to the recording.
- Exit editing mode by clicking the toggle in the top right corner.
Evaluating the resulting ARK section
At this point we’ve given the students everything they need for this week. However, when a student sees a page like this, they are forced to make a few decisions they are not given information to answer:
- Do I need to read all of this?
- Do I read it in this order?
- How long will it take?
- What if I don’t have time?
It can be helpful to think of digital experiences in terms of physical analogues. Adding readings to ARK without clear directions and signalling, is like walking in to class and leaving a pile of handouts underneath your laptop, never referring to it in class and then asking the students the following week if they completed the reading.
If we revisit Signalling Principle, we recall:
“learning materials become more effective when cues are added that guide learners’ attention” 1
Step Two: Applying Signalling Principle
- We’ll begin by adding an introduction to the week. We’re going to enter Editing mode and click the three dots to the right of the section name to edit the section description.
- We’ll paste a description of what we’re doing this week and the learning objectives.
- And apply some formatting to make this neater. We’ll make Objectives a medium sized heading and turn the objectives into an unordered list.
- Click Save changes.
Step Three: Organising the Content
This is where Text and Media Areas really shine. A Text and Media Area is exactly what it sounds like, an area on a section page that can be used to display Text and Media. You can use them to:
- provide directions,
- add illustrations,
- instructional content,
- or other text and media material
- Click Add an activity or resource and select Text and Media Area.
- Add our text and make it a large heading.
- Click Save and return to course.
- We need a few of these so we’ll speed up the process by clicking on the 3 dots to the right of the resource, and select Duplicate.
- Edit that Text to say Optional Reading and we will make this a medium sized heading.
(I’ve also added a Resources text area and a Discussion Questions text area).
Step Four: Sequencing the Content
Web usability studies have long pointed to the problem of getting users to move deeper into the page, either by clicking onwards or scrolling down (see Amy Schade, “The Fold Manifesto: Why the Page Fold Still Matters” (Nielsen Norman Group)). We don’t want to bury the actions we want the students to do, so if you have optional material, apply the inverse pyramid principle to your section pages by placing important and required material at the top and optional material towards the bottom.
With that in mind, we’ll move the Optional Reading down below the Resources.
We will tidy up some of the Drag and Drop files by renaming the readings and providing a citation. We’ll open the settings and change the name to include a short citation.
We’ll include the page numbers in the title because it helps students gauge how much time they will need to complete the task.
We’ll add a citation. To show the citation, we will click Display description on unit page. Save changes and return to unit.
Repeat for the other reading. Updating the title and description. Clicking to display description on unit page.
We’ll make it easier for students to prepare for the forum by showing the description for that on the unit page.
Disable edit mode.
Step Five: Remove any Guesswork
We can improve our signalling further by providing clear instructions for the students as to what they will be doing this week. To do that we’re going to add a task list to the top of the section.
- Add another Text and Media area. We’ll make the first line a medium heading and create an ordered list for the required reading and activities. We’ll let the students know there are additional resources at the bottom of the section, making that a medium heading an unordered list – they can do it in whatever sequence they like.
- Now we’re going to reorder this. In the new version of ARK, we can do this by using the sidebar. When editing mode is enabled, you can reorder items in the sidebar, including dragging content from the main section to somewhere in the sidebar.
- Turn off editing mode.
Tip
Now you might be wondering why that last Text and Media Area isn’t just part of the description. This is just a trick to make editing easier later. Text and Media Areas are easier to duplicate and re-sequence than descriptions.
The only catch is you need to be mindful of trailing paragraph breaks at the bottom of your text editor to avoid massive gaps between text areas.
Van Gog, T. (2014). The Signaling (or Cueing) Principle in Multimedia Learning. In R. Mayer (Ed.), The Cambridge Handbook of Multimedia Learning (Cambridge Handbooks in Psychology, pp. 263-278). Cambridge: Cambridge University Press. doi:10.1017/CBO9781139547369.014 ↩︎